
Repairing a compound soundpost crack using a thru-patch
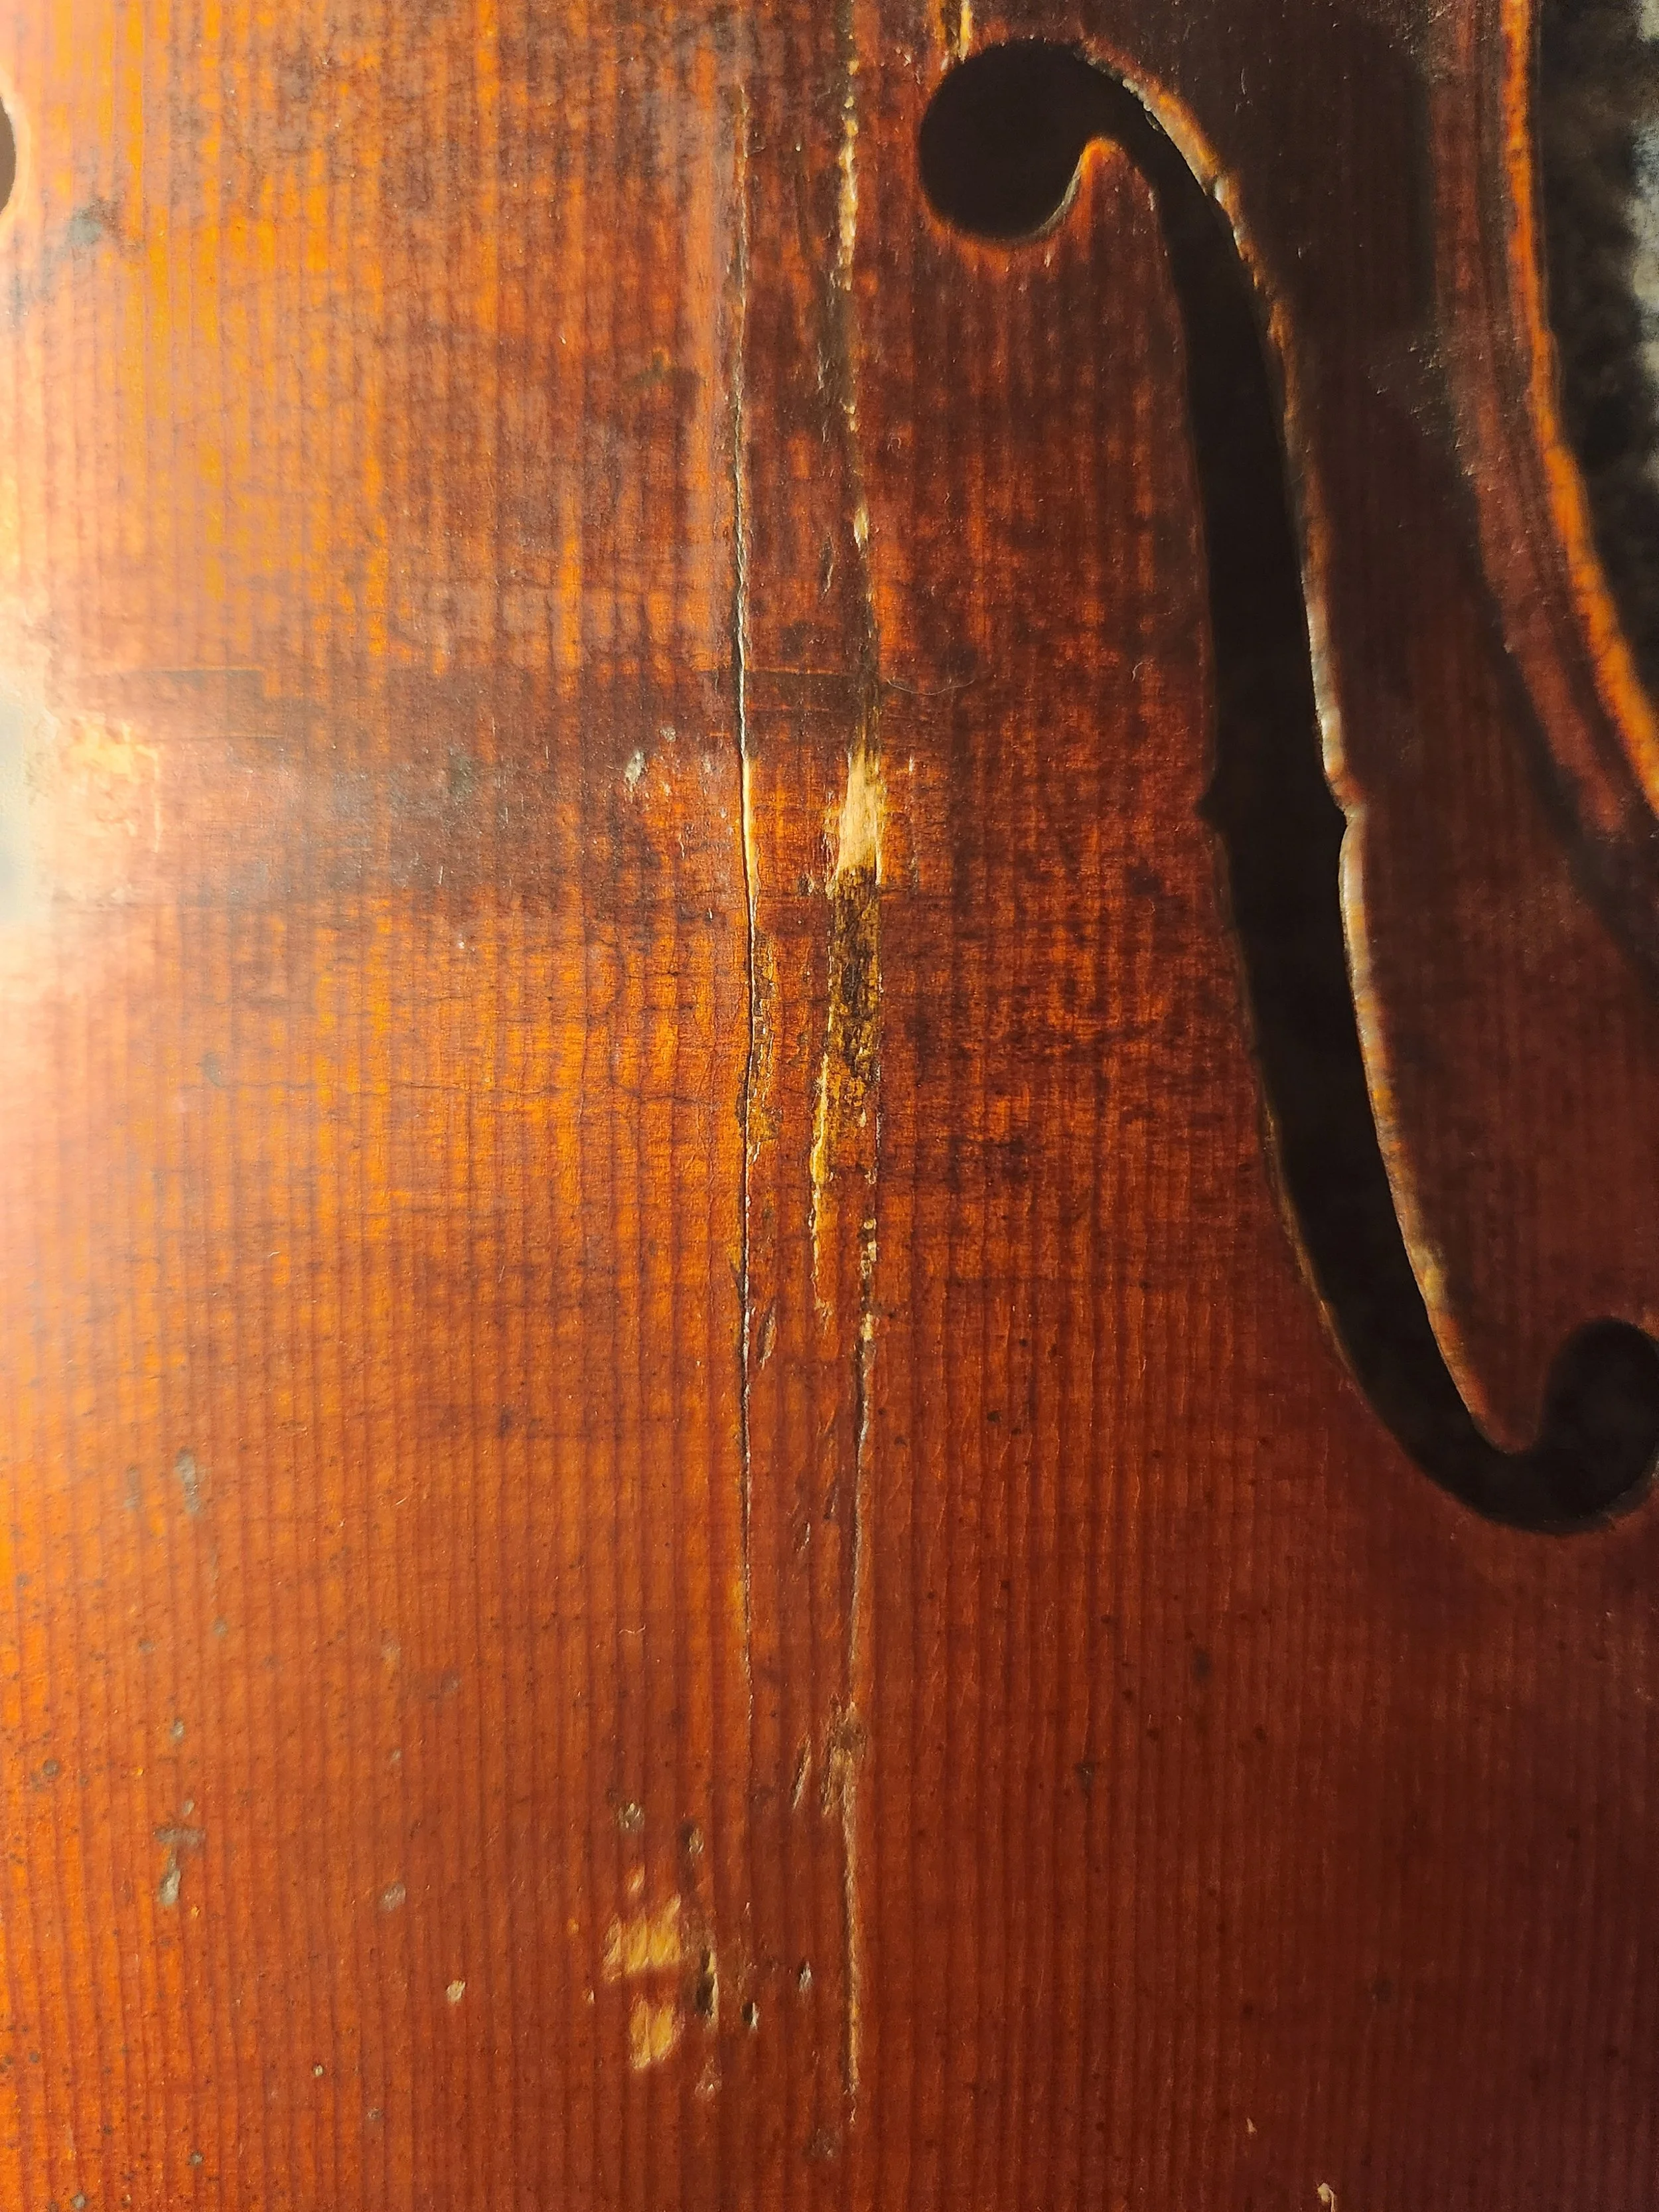
Original condition of the violin, before repairs.
This handsome 20th century Derezay violin had extensive damage to the soundpost area. When a crack forms in the area of high tension from the soundpost’s pressure, a normal repair of gluing and adding a few cleats will not hold up. In this case, there were two cracks, a mere 4 grains of wood apart, as well as missing wood from the trauma of these breaks that had been filled but not truly repaired. The inside of the violin was heavily scarred from ill-fitting soundposts over the last 150 years. It was time for a real restoration.
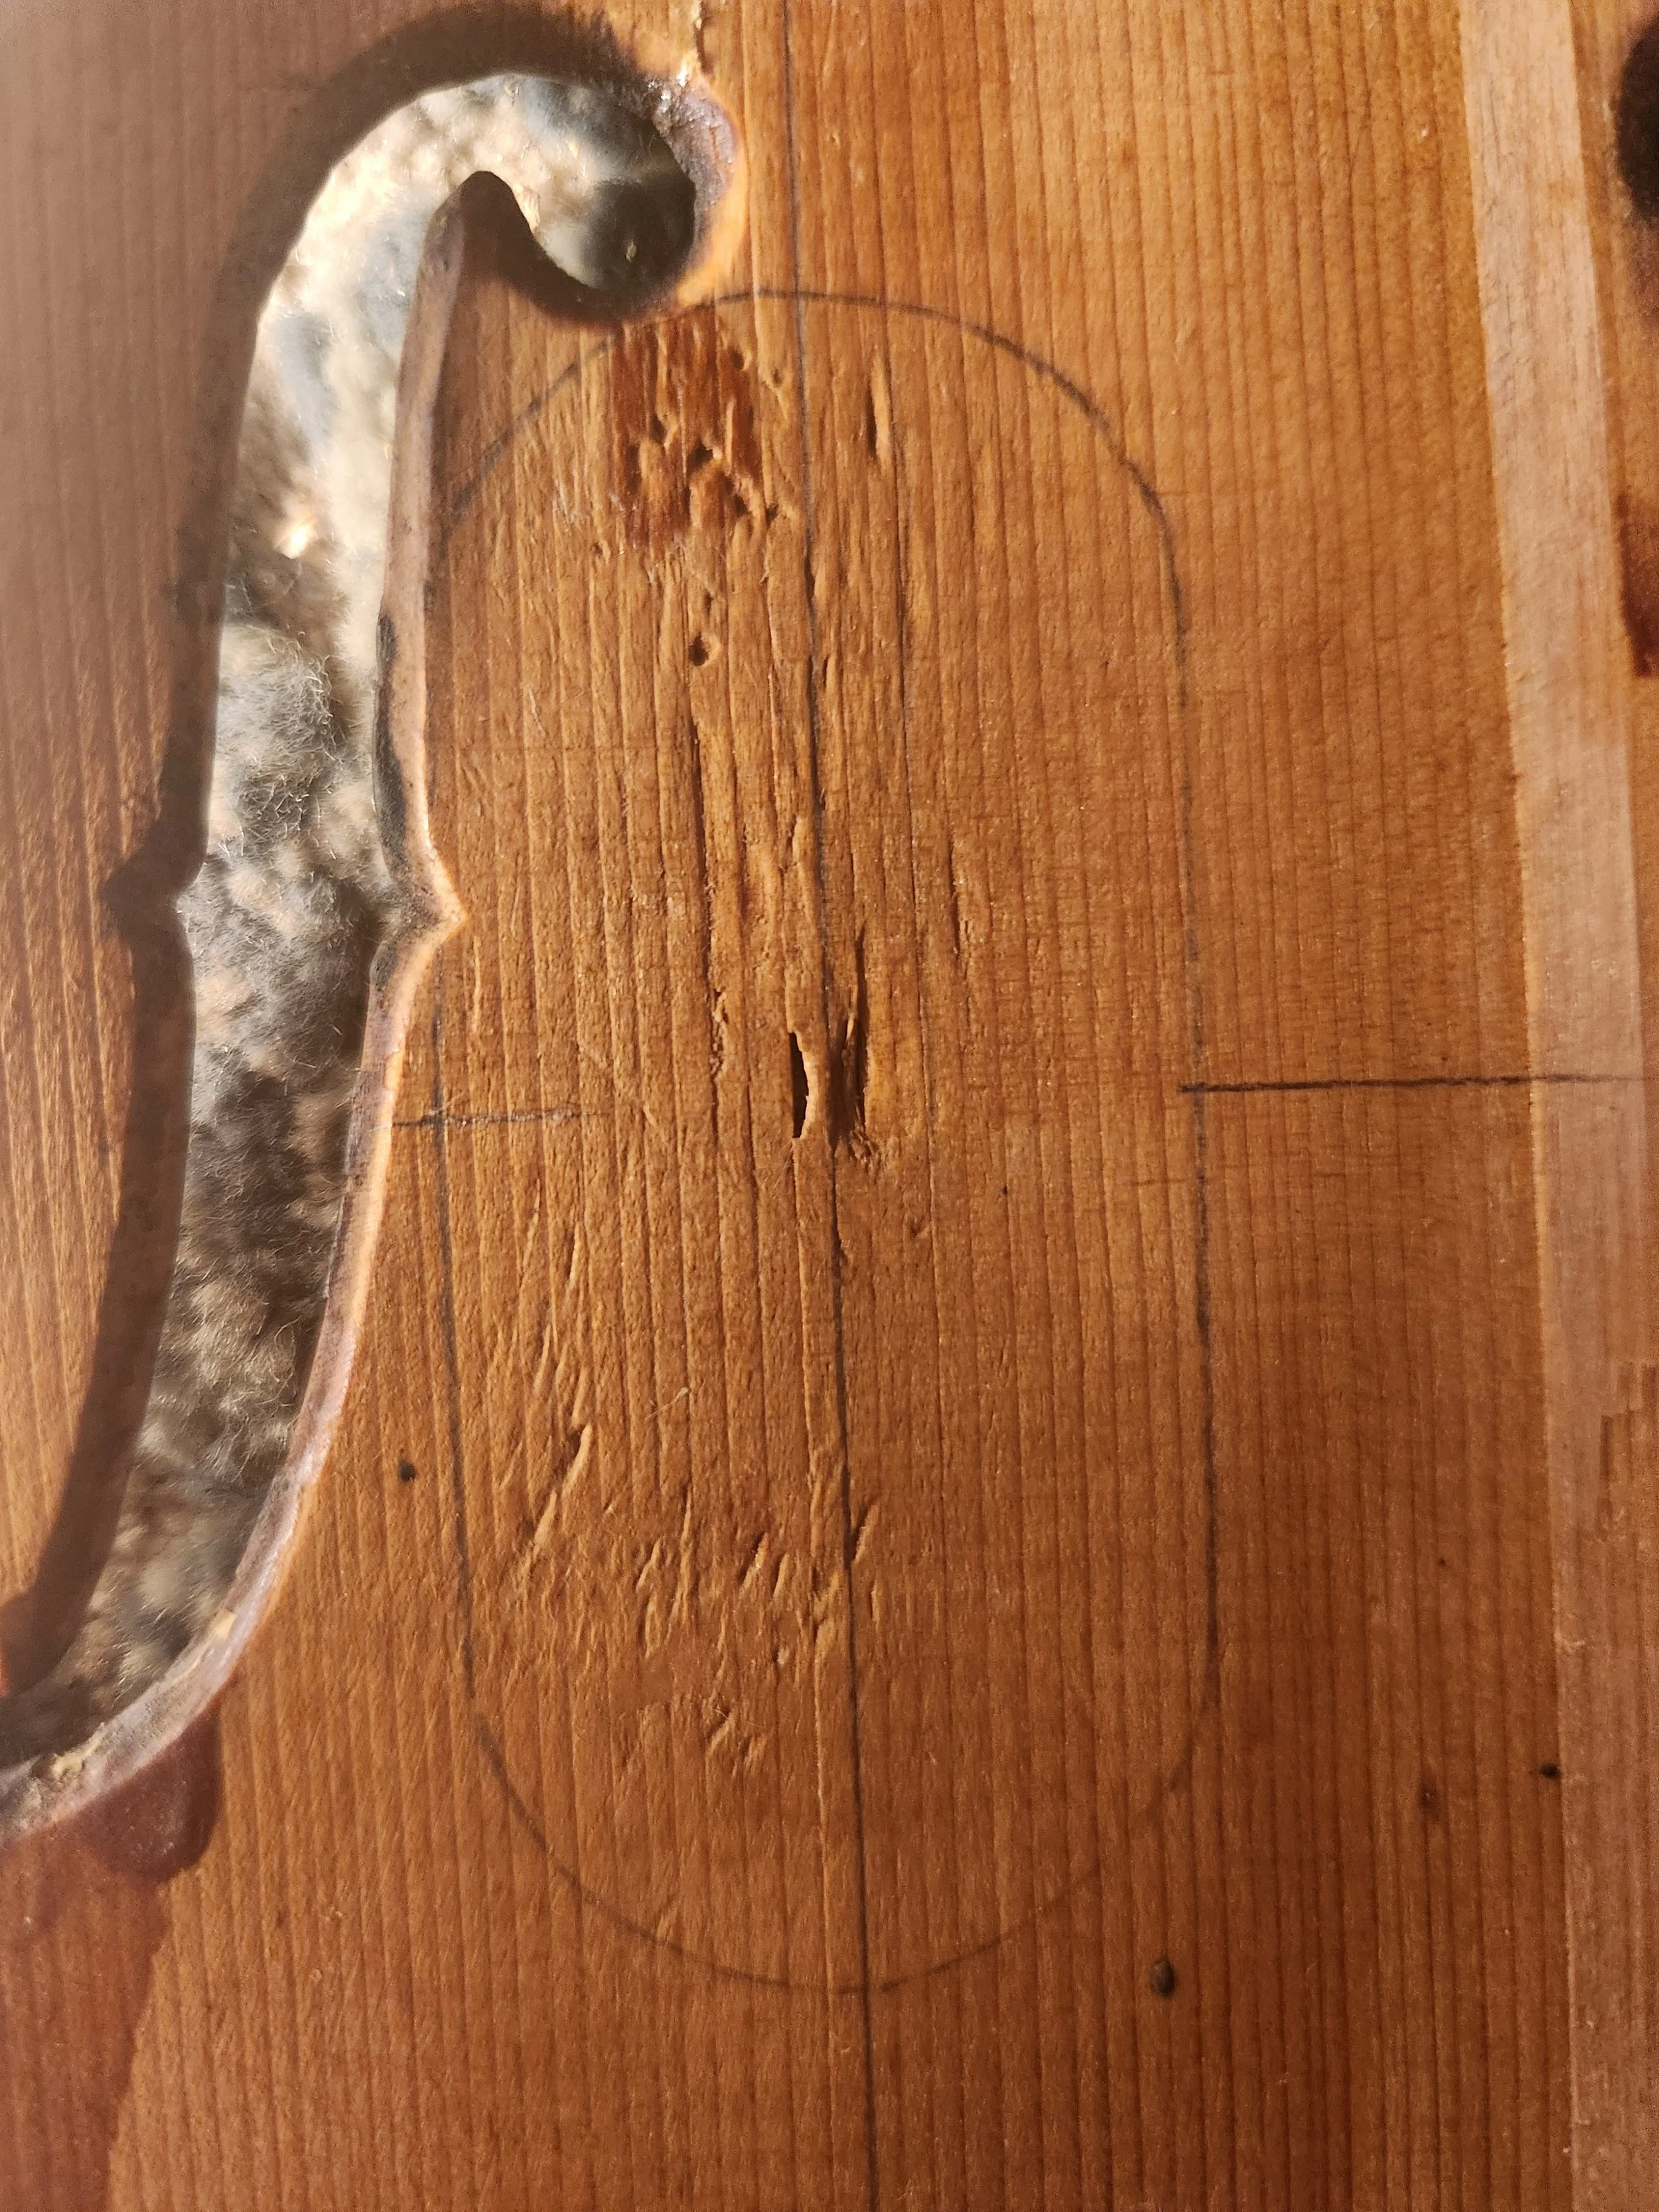
Original condition of the inside of the violin in the soundpost area, before repairs.
Soundpost Thru-Patch
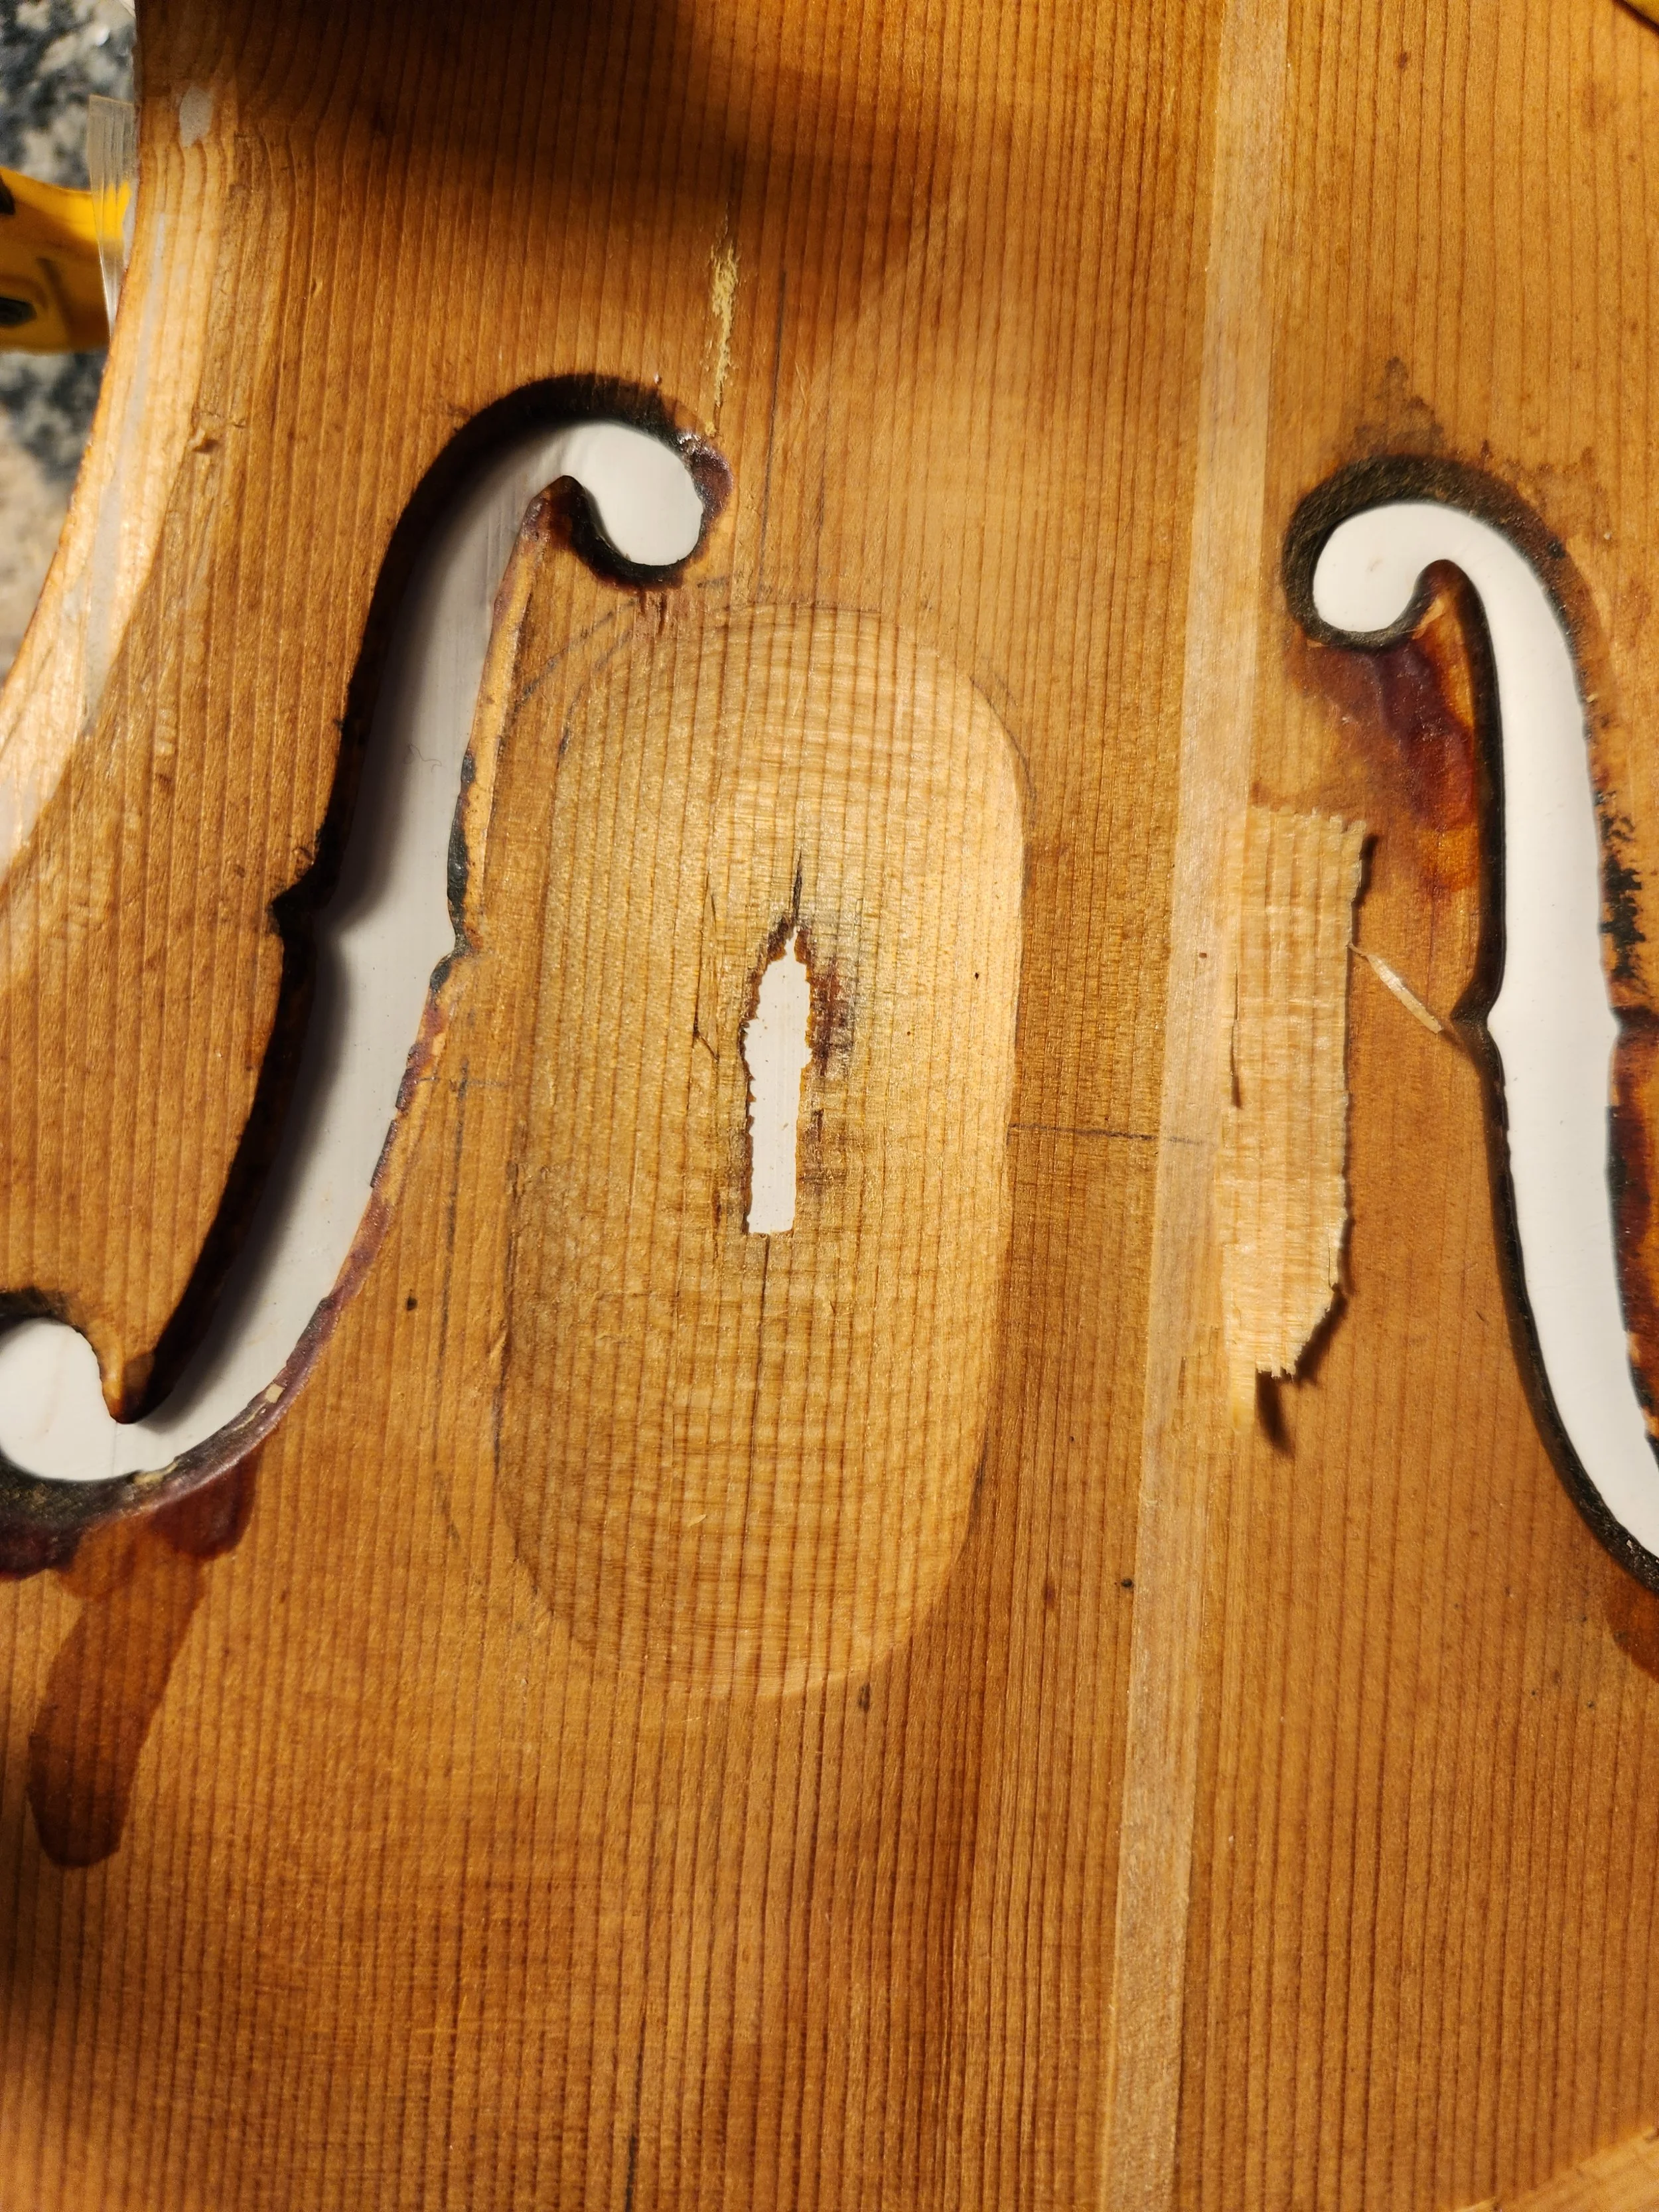
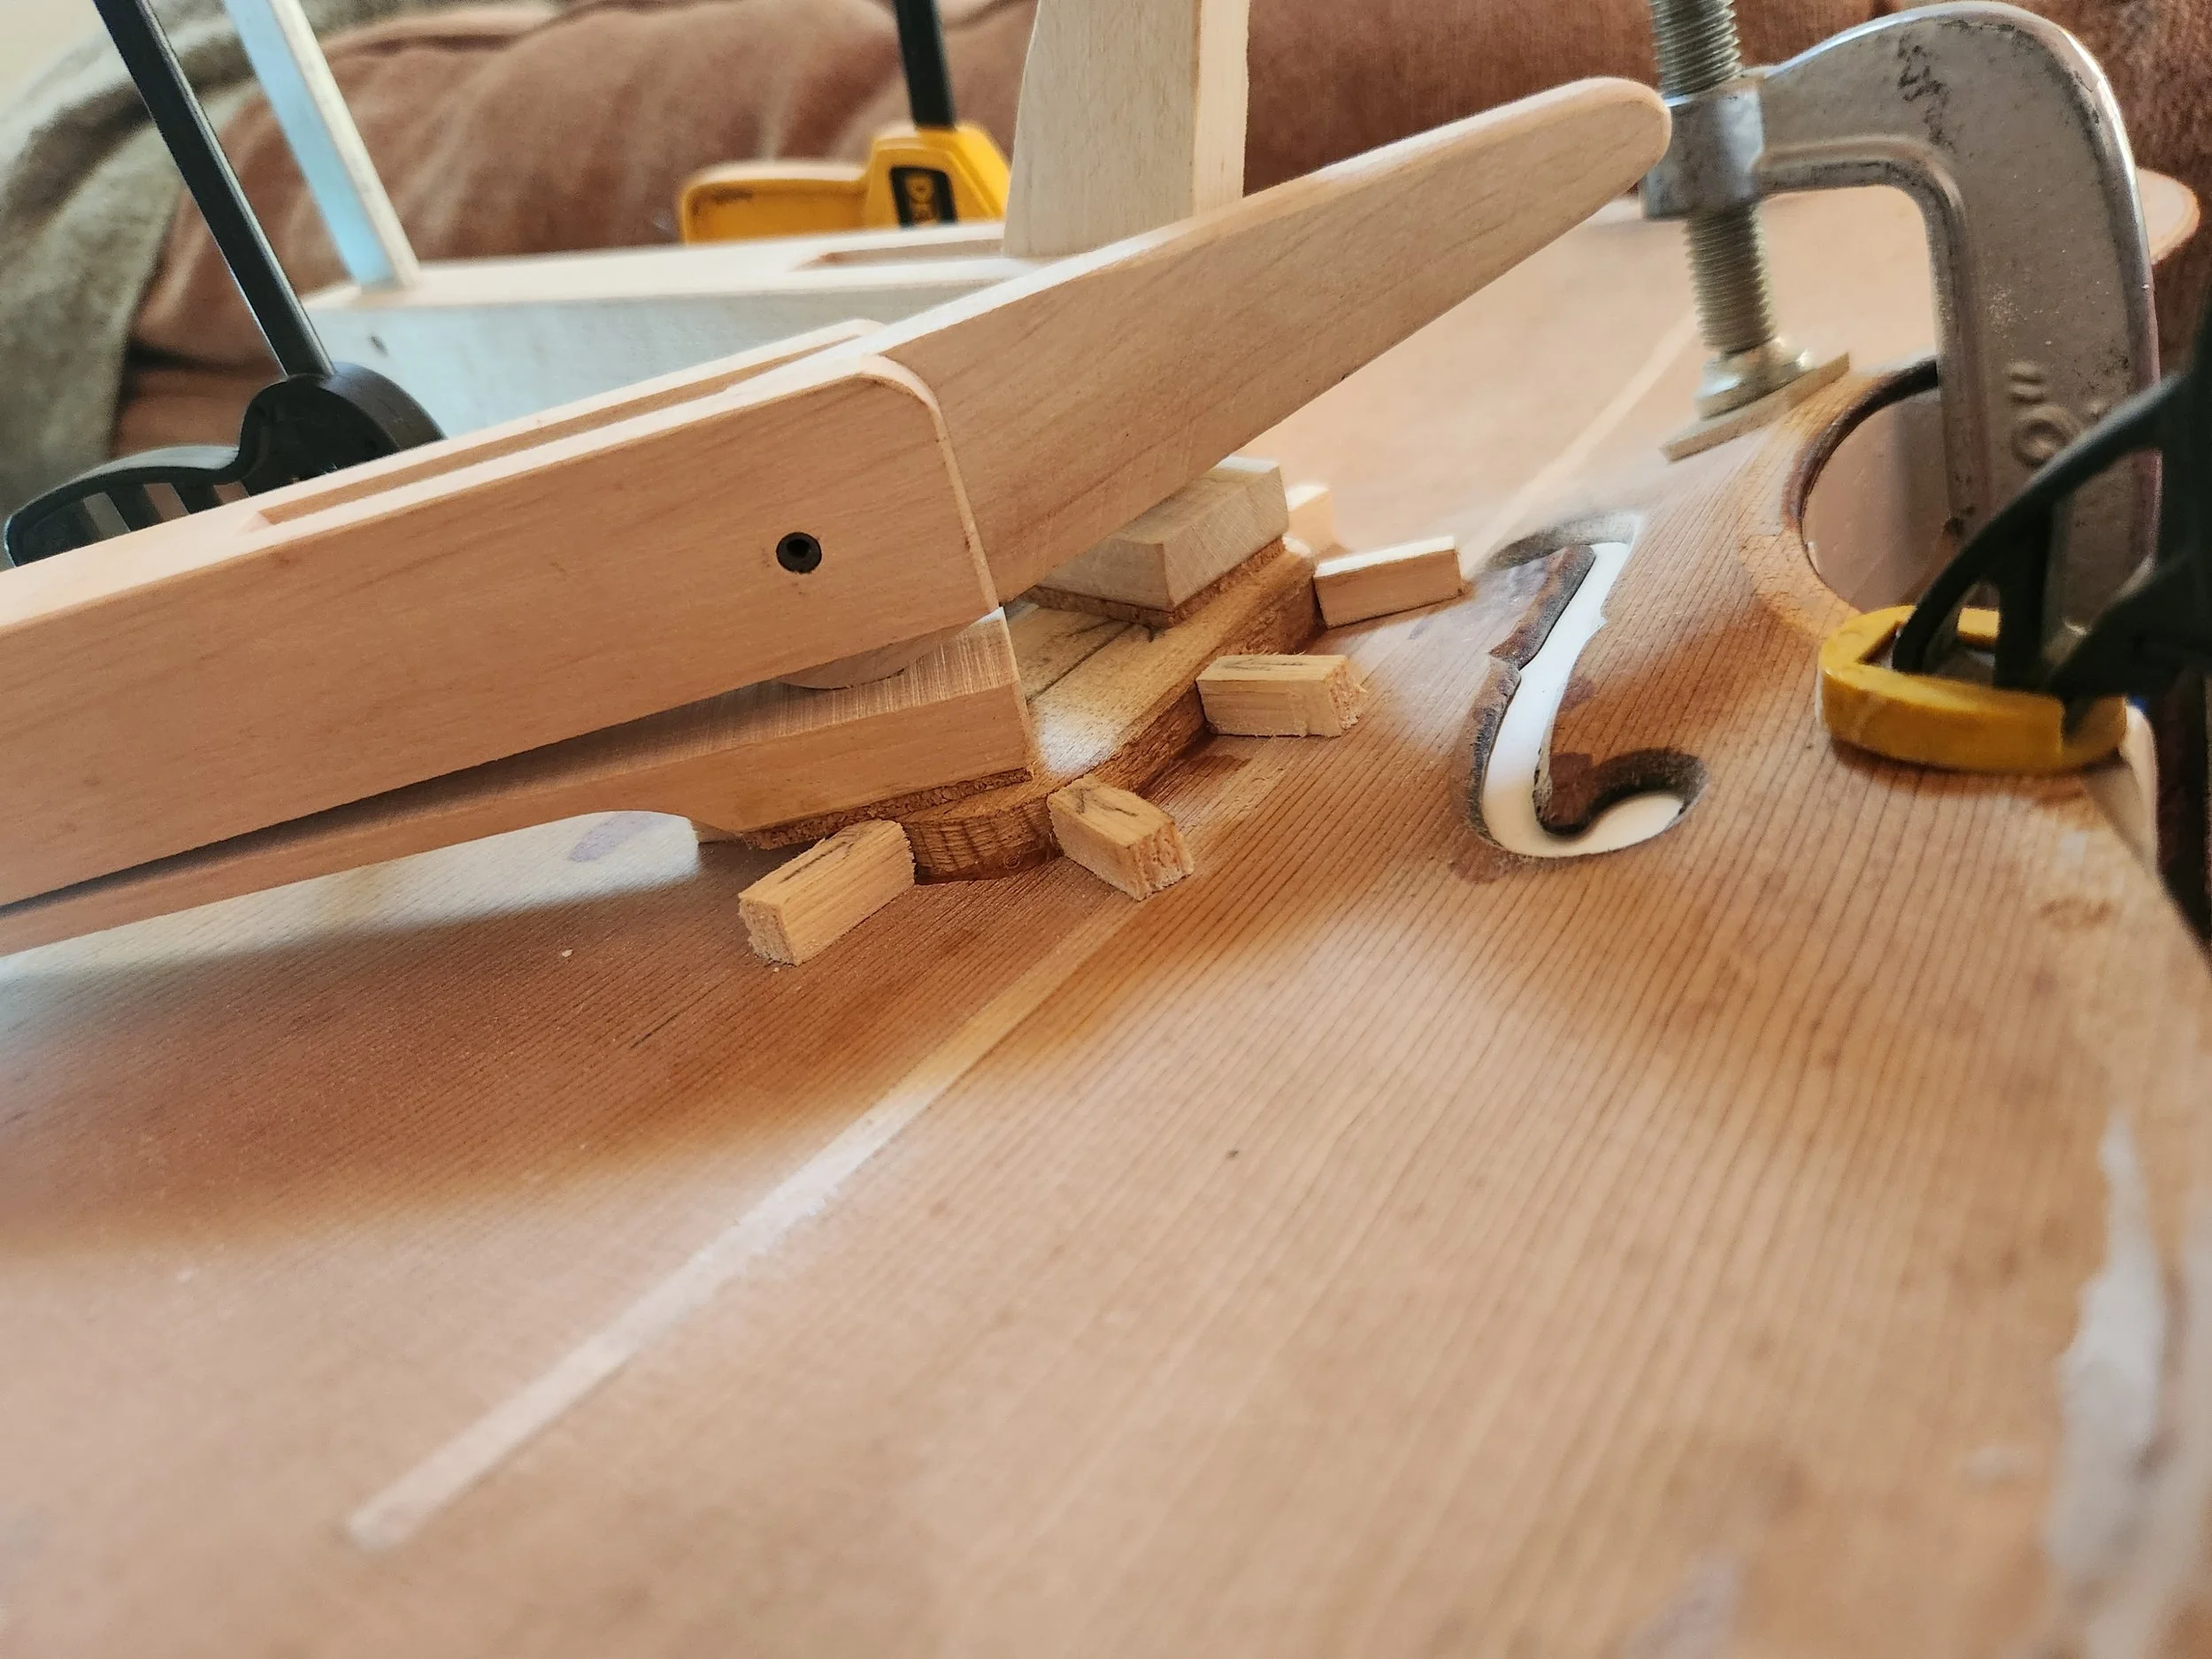
In this technique, I made a plaster cast of the top of the violin, the white bed that the top is sitting in. This provides a perfectly fitting counterform for clamping the top into as I do the repair work. Then I painstakingly excavated out the damaged wood where the cracks were, including the area that had been filled with woodfiller in the past during another low-quality fix. When making a soundpost patch, the luthier usually excavates to within a half-millimeter of the outside varnished surface, but in this case, I needed to replace the area that wasn’t wood—I needed to replace with wood the area that was stop-gap “fixed” with woodfiller. So my excavation needed to come out through the other side. I saved a shaving of wood from directly above the “window” I created with my excavation so that I could EXACTLY match the wood. See the “woodchip” of original wood sitting on the top in the picture above, and the rest of the process below.


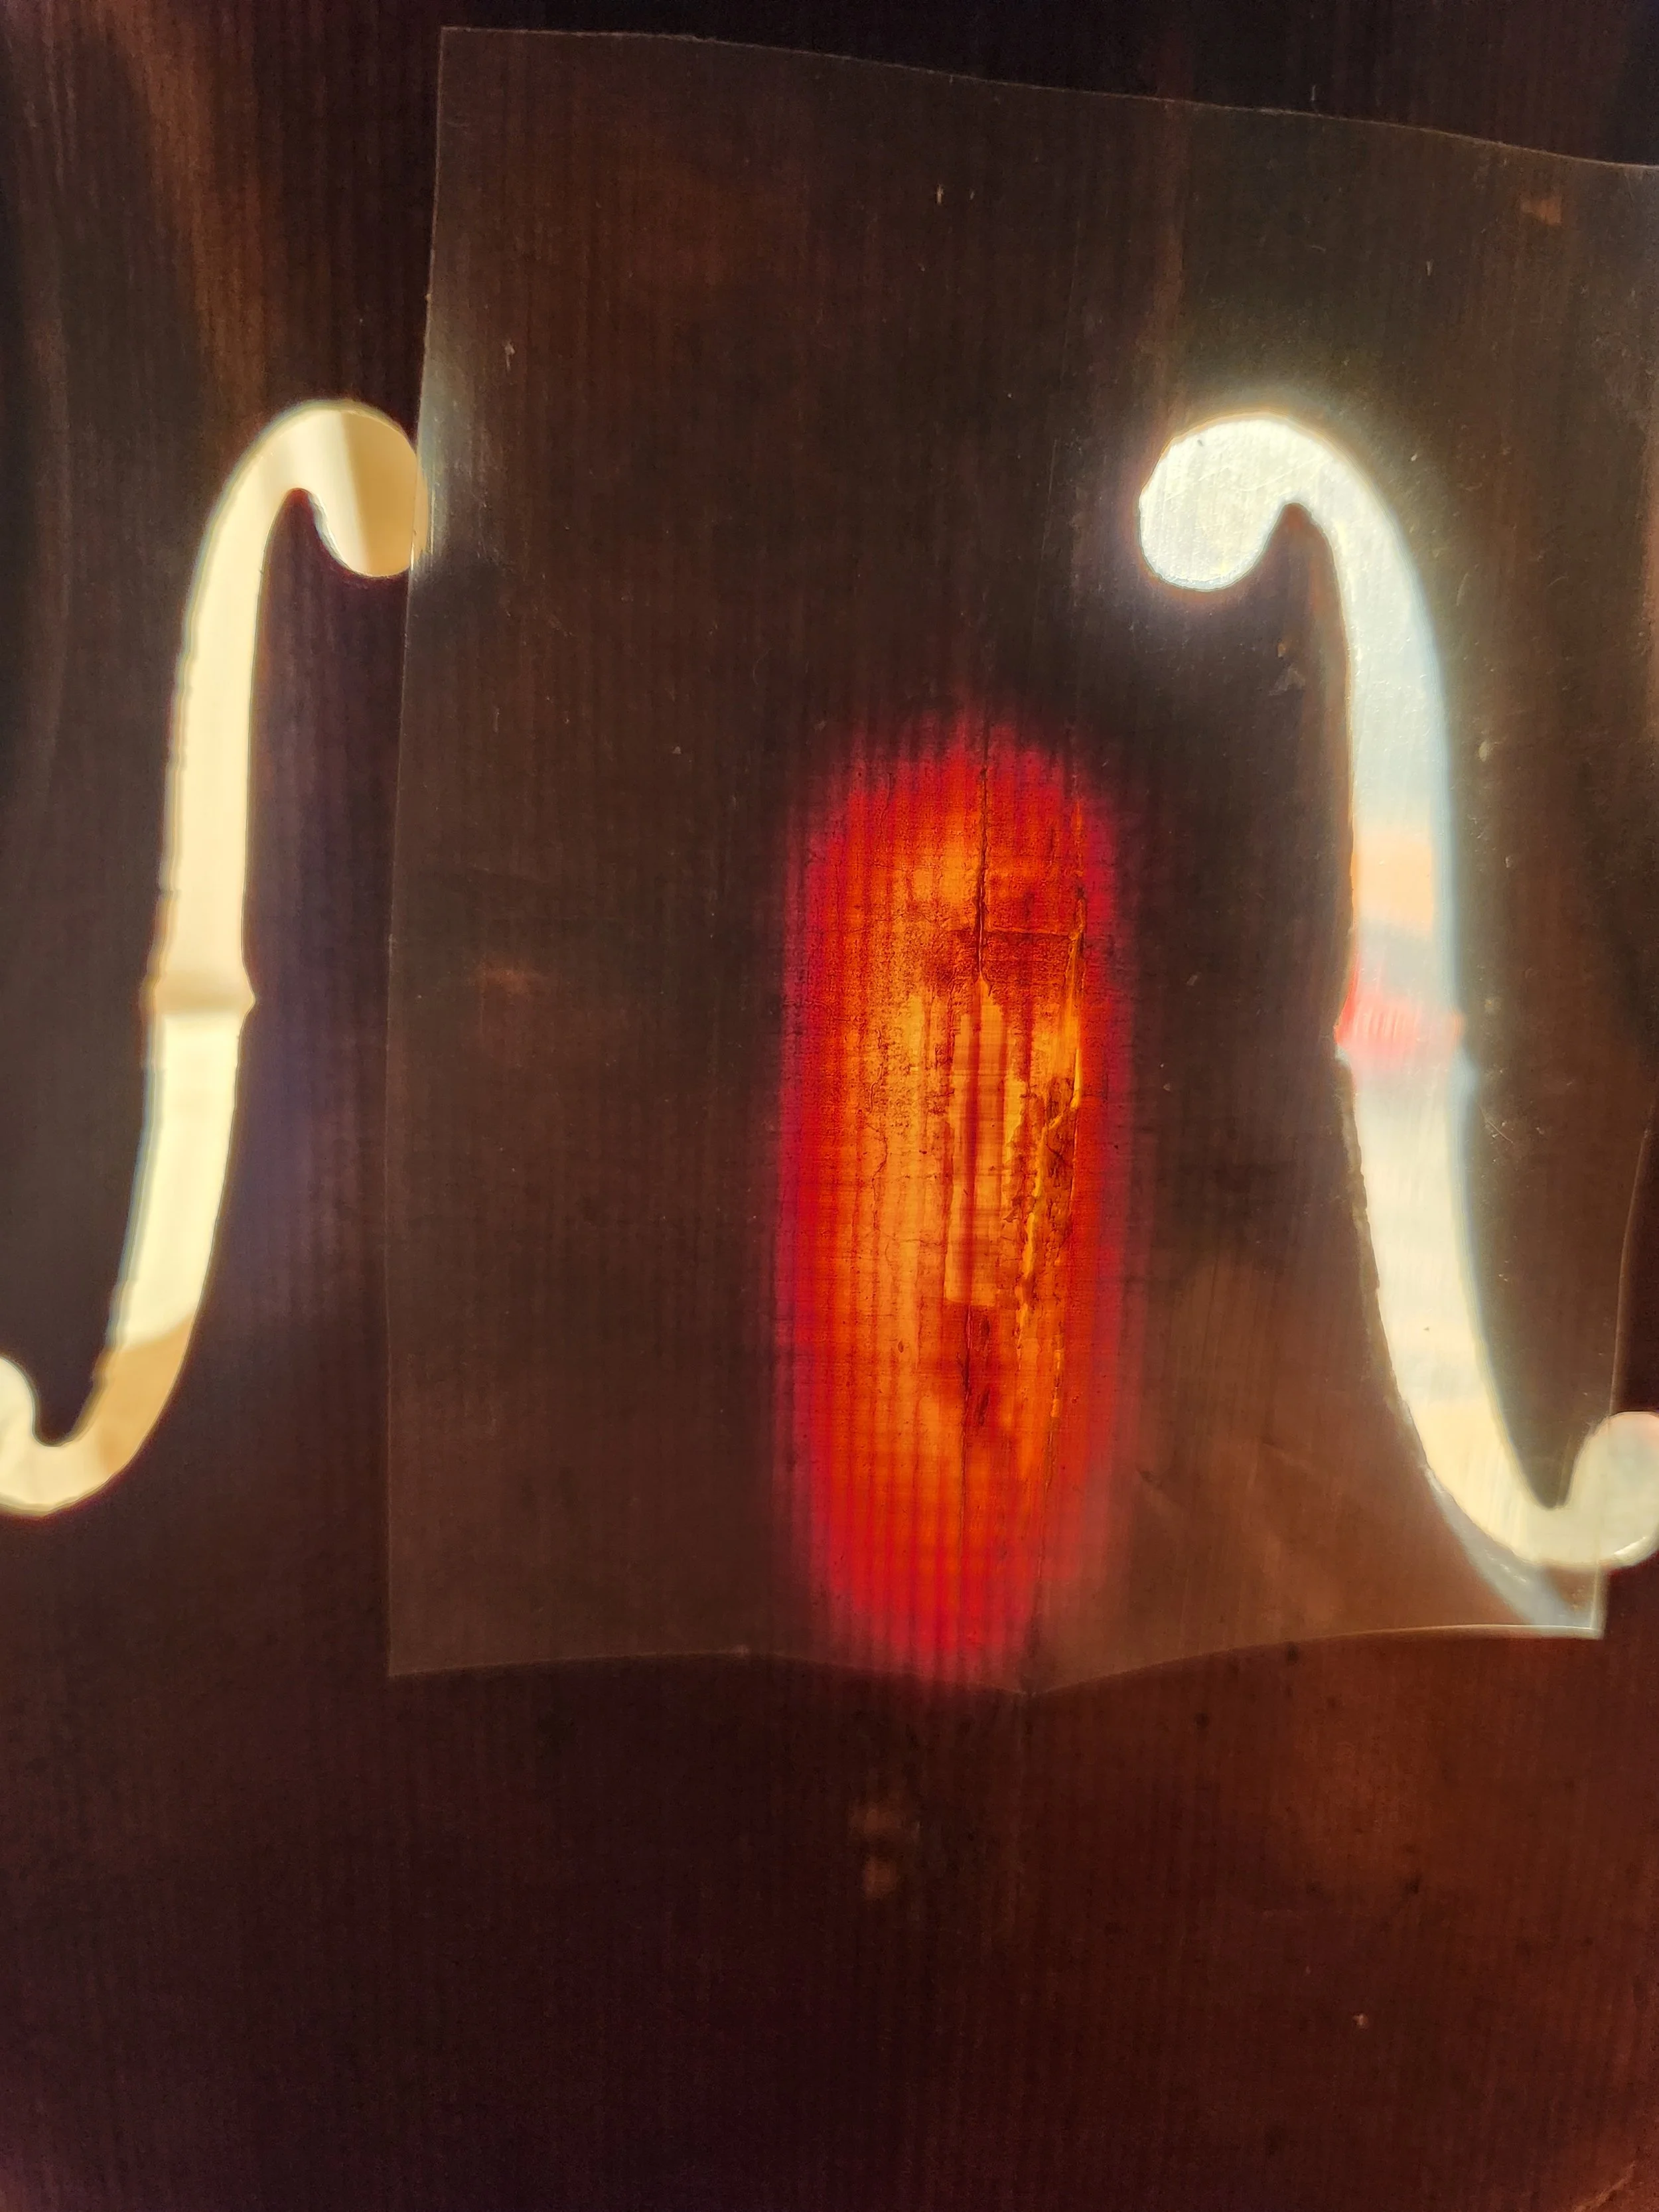
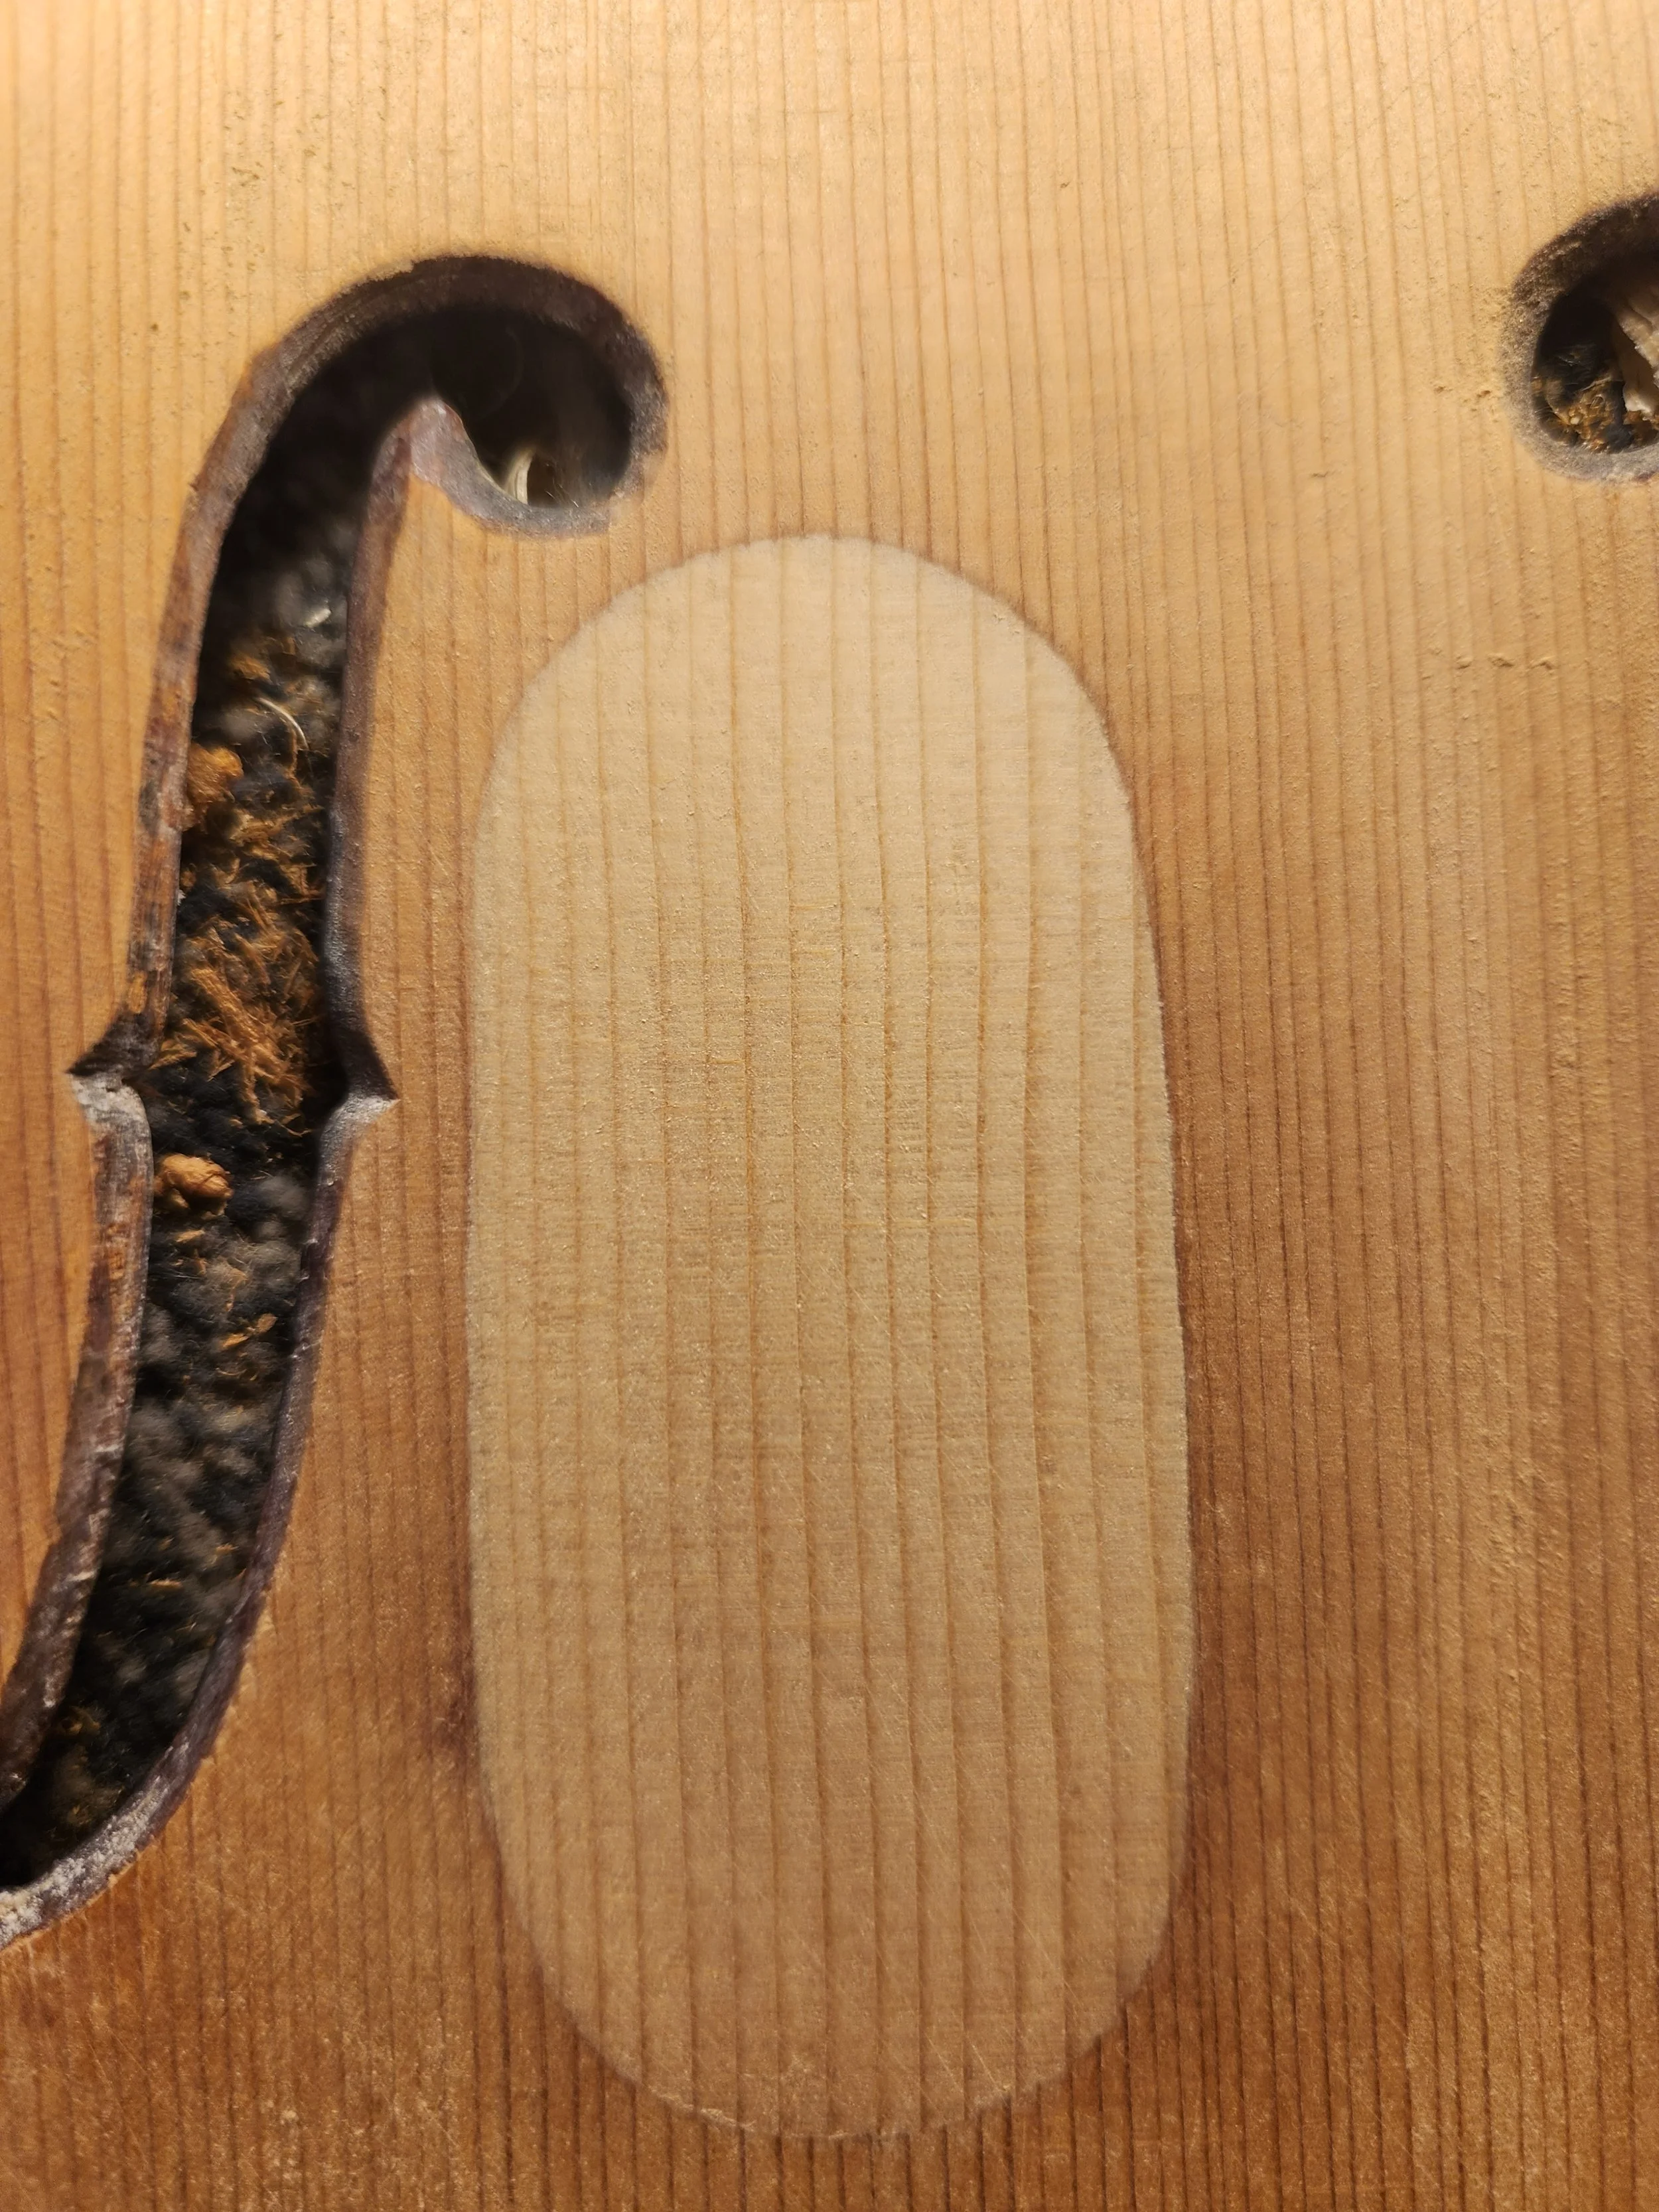
I glued in the woodchip, exactly aligning with the wood grains. By using a piece of wood from the original top, with the EXACT grains that needed to be replaced, I had a perfect match. You can see, from the picture of the light shining through the area where the patch was going to be fit, just how thin and precise this process must be to maximize the replacement of damaged wood with new solid strong wood. See that process below:

Lastly, and my favorite, comes varnish restoration. This is where the diligence and care I take with woodworking pay off and the final result reflects a solid and lasting repair.


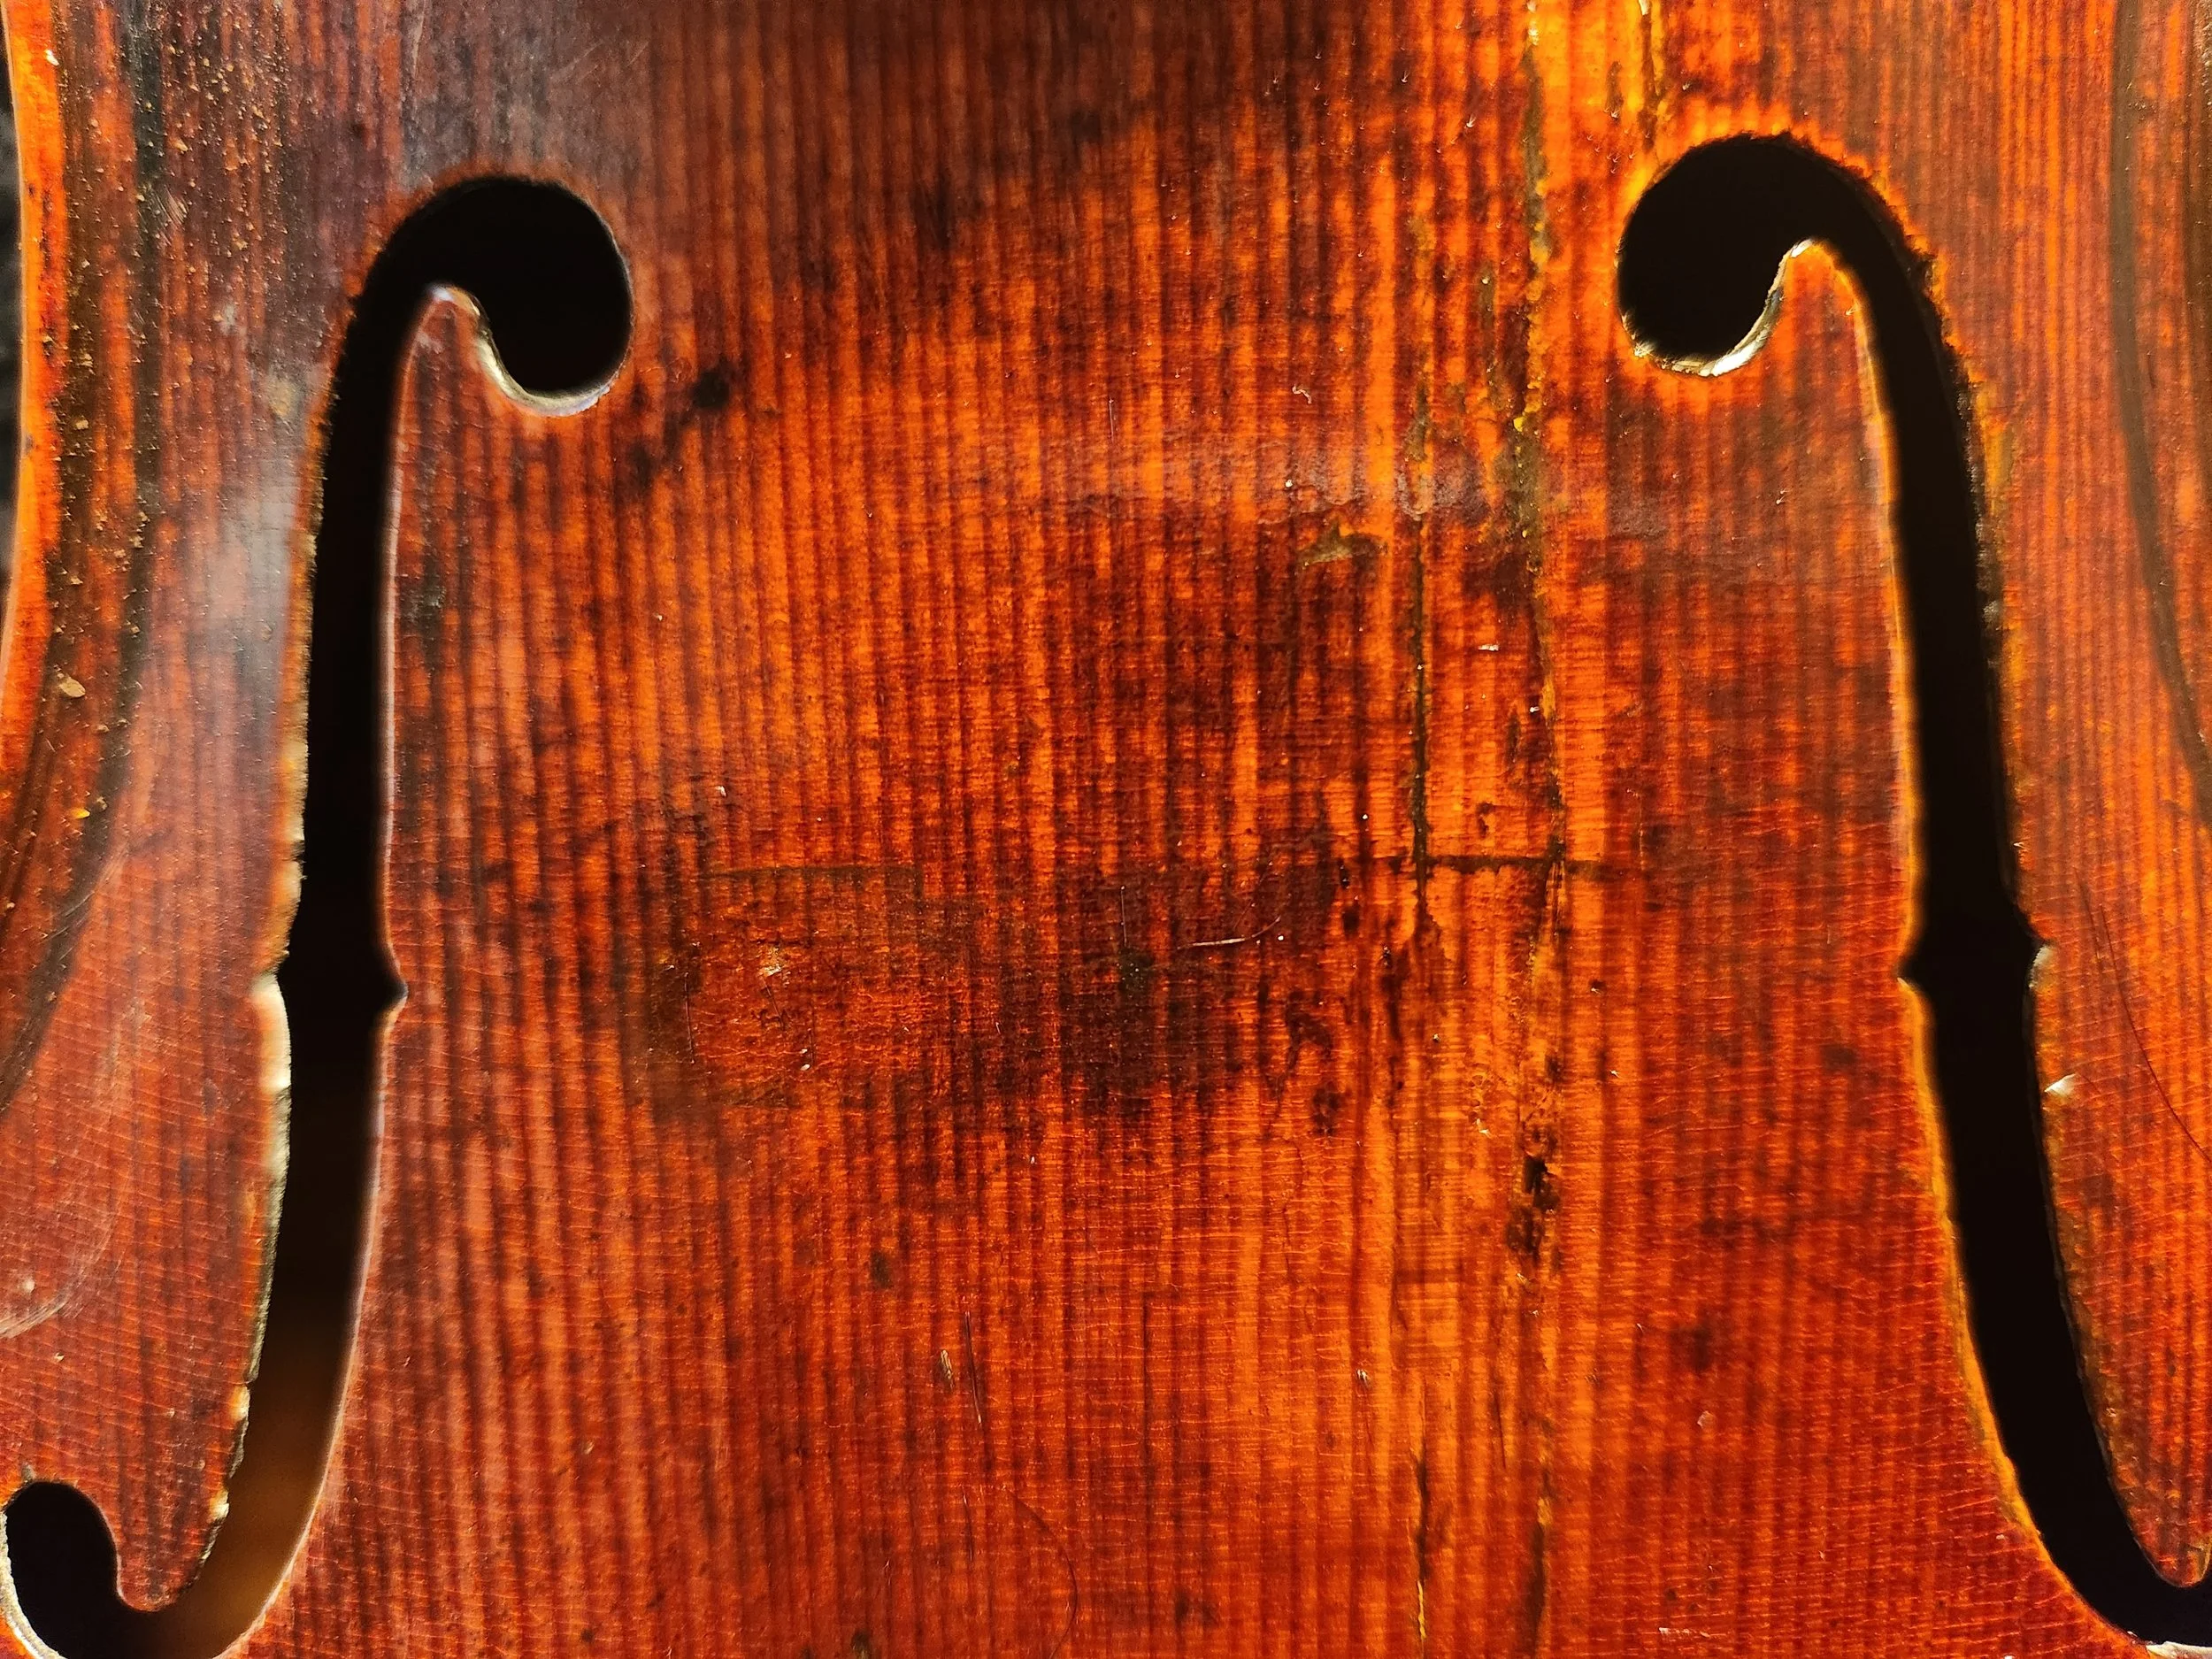
The final result. No more woodfiller. No more cracks.